Wood is considered an environmentally friendly material for the construction of residential buildings, so it is not surprising that the demand for beautiful and comfortable houses made of timber or logs is not reduced. First of all, a residential building should be safe in terms of electrical installation.
It is important to understand how an electrician should be held in a wooden house. You need to know how to introduce and organize an electrical system so as not to harm the health of residents and ensure the safety of property. We have detailed all aspects of this issue.
Our article will familiarize you with the general requirements for wiring. We will talk about the methods of establishing an electric network in a house, the rules for arranging an electrical panel and how to install cables. All electrical work must be carried out in strict accordance with the fire regulations we have submitted.
General wiring requirements
The main difference between wooden houses and reinforced concrete and brick structures is a high degree of fire hazard. This means that increased requirements apply to the choice of electrical devices, cables and the conditions for their installation.
According to statistics, about 1/2 of the cases of fires or fires in wooden houses or in houses with wooden finishes is due to gross errors of electricians.
It is wrong to install the outlet, it is not enough to carefully connect the wires in the junction box, ignore the grounding rules, as there may be a fire, and then a fire.

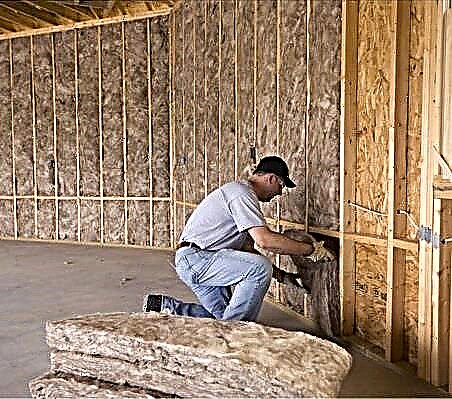
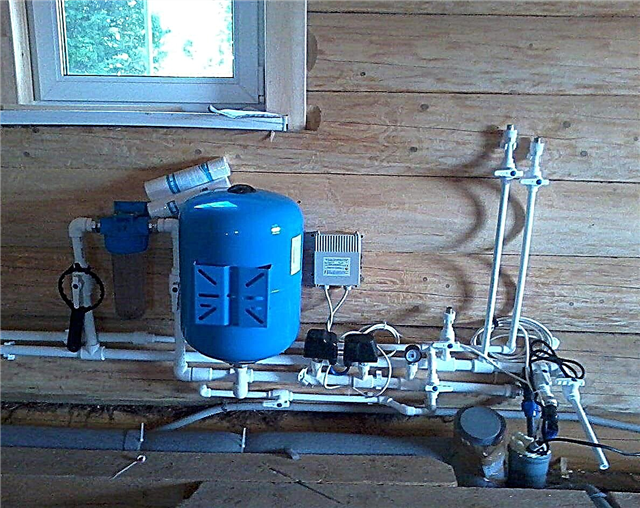
Undemanding owners of a wooden house entrust electrical work to neighbors, acquaintances, or do it on their own, not knowing thoroughly the rules of the PUE. The sad result of credulity and lack of professionalism - in the photo
It is necessary to know the basic rules of electrical installation for two reasons: to be able to independently carry out part of the installation or repair work and to control the actions of unscrupulous “specialists”.
The following requirements should be remembered:
- Technical characteristics of cables and electrical equipment should maximally correspond to the power consumption of devices of each individual group.
- The operation of sockets, switches, emergency shutdown devices must be carried out taking into account the burden imposed on them.
- It is forbidden to use cables, wires, terminal connections during their regular heating.
- It is necessary to completely exclude the transfer of fire from the cable to structures made of wood or other flammable materials using fireproof protection.
Wiring should be completely safe for home owners, their families (especially young children), and pets.

Strict requirements are highlighted, and sometimes aesthetics have to be sacrificed. For example, owners of a wooden cottage need to put up with external outlets and enhanced protection for both hidden and open electrical wiring (NPB 246–97)
The material from the video reviews and instructions posted on the Internet is very controversial, so you should not fully rely on the opinions of people in overalls. You should focus on excerpts from the normative documentation - sections of the PUE, SNiPs, GOSTs.
Entering the power line into the house
In Russia and some other countries (unlike, for example, Europe, where the wires are hidden in the ground), electricity flows to consumers through overhead power lines - to the ultimate support.
Then it is transmitted to users in three ways:
- self-supporting insulated wire (SIP);
- underground;
- on a cable (rarely used).
The first option is the most popular.

It is recommended to install a wooden or concrete pillar with a metal shield for an electrical switch on the entrance to the adjacent area. This is the best option to turn off the power supply while repairing or replacing networks
Together with the machine, electric power meters are also installed. Special boards (ЩУЭ) are intended for this purpose. According to the rules, ShchUE can mount a box on the facade of the house, and inside the building, then the wiring diagram will change slightly.

From the central highway of power supply to a support in a private area or directly to the house, a SIP (with a cross section of at least 16 mm) is pulled, which is fixed with anchors or clamps. Height from the earth to the stretched wire of 2.75 m and more
To insulate a wire running along a wooden surface, use fireproof boxes or corrugations for electrical wiring. The transition through walls and ceilings is carried out in protective sleeves made of metal, plastic analogues are unacceptable.
But it is recommended to use a polymer gasket on bends to protect the cable from wear. Plastic materials are treated with fire fighting solutions with flame retardants (for example, special paint).
Inside the house, SIPs do not start. According to the standards, exclusively copper wires can be laid inside and on top of combustible structures, therefore, aluminum analogs will also have to be excluded.
To choose a cable for wiring in a wooden house, you need to pay attention to the type of insulation. The best options for a wooden house are recognized by VVGng and NYM.

The transition from SIP to the house wire according to the standards should be carried out from the outside of the building - under the roof, on the facade or inside the metal shield
If the metering board is mounted on the facade, for example, at the request of the service company, then the self-supporting insulated wire is connected inside it to the machine, and then, up to the main switchboard - the distribution house switchboard - they pull VVGng.
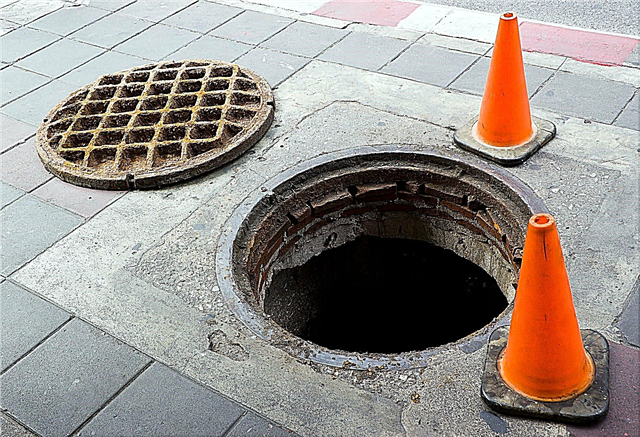
What to consider when laying the cable underground:
Image Gallery
Photo from
VVGNG cable is suitable for installation underground
Cable trench depth - at least 0.8 m
The use of HDPE and metal protection
Cable foundation sleeve
It is worth mentioning that the underground method of introducing an electric cable into a building is more expensive and more complicated than using SIP.
Features of the electrical panel device
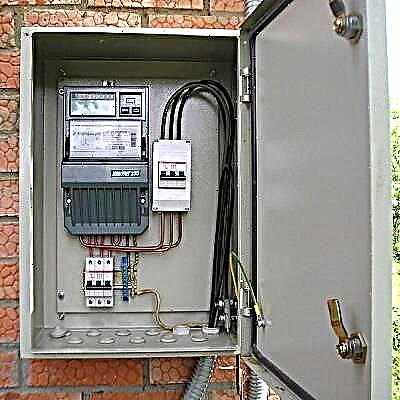
Externally, the switchboard is a plastic or metal (which is preferable) box with a door with mounts for automatic machines and an electricity meter.
It has no size restrictions, and when a new box is installed, they always leave a little free space for further connections.

Inside there is a meter (sealed), the main automatic shutdown device (RCD), which is also sealed, and single-pole circuit breakers of various groups of electrical wiring (lighting, socket, etc.)
The circuit breakers are mounted on the DIN rails provided for this. The rated value of the machines directly depends on the parameters of the connected line: if the permissible limit of the outlet group is 16 A, then the machine must correspond to this value.
In the presence of automatic machines, the installation of an RCD is not necessary, but its installation should not be neglected. Additional protection is triggered when a leakage current occurs. Manually disconnect the RCD when it is necessary to shut off the flow of electricity into the house.
Despite the expensive cost of the equipment, responsible electricians insist on installing protection in zones, which increases the safe use of the power supply in a wooden house.
The nuances of connecting RCDs and machines in the dashboard are described in this article.
Rules for open wiring
Methods for open wiring should not contradict the requirements of the PUE.
Therefore, to attach cables to the wooden surface of walls, partitions or ceiling, the following products can be used:
- ceramic or porcelain insulators;
- floor skirting boards with integrated cable channel;
- corrugated and rigid PVC pipes;
- PVC box;
- metal boxes and pipes.
Specific names of products are indicated in the design documentation, and with respect to wooden structures, they must be accompanied by a fire safety certificate and be marked with the label "NG", as not supporting combustion.

The installation of cable channels and other mounting elements must be thought out in advance, since the protruding parts can interfere with the arrangement of furniture or the solution of other interior issues
There are no questions with the choice of cable channels, since in construction stores you can choose products both in color and width, and with a set of related accessories - plugs, rotary elements, adapters.
It is better to choose thick-walled, wide enough products with a single lock, since boxes with a double lock are more difficult to maintain.
Installation requirements and recommendations:
- The cable, as well as protective fittings, must not support combustion, that is, it must be marked with "ng". The best option for wooden houses is VVGNG-ls (with low smoke emission).
- The presence of a metal platform for installation - a fireproof base that increases the safety of the use of electrical appliances.
- Switches and sockets - only overhead, outdoor.
- The use of metal sleeves to organize the transition of cable through wooden walls, floors, partitions.
Sleeve sleeves are pieces of thick-walled metal pipe that should protrude 1 cm on each side of the combustible structure. To prevent the cable from being deformed, the edges of the sleeves are protected with plastic overlays.

According to the rules of the open wiring section between the sleeve and the box should not remain. The end of the sleeve coming out of the hole must necessarily go inside the box
When choosing the cross-section of an electric cable for laying in a wooden house, they are guided by generally accepted norms:
- 3 * 2.5 mm - for sockets;
- from 6 mm² - for powerful electrical equipment, for example, electric stoves;
- 3 * 1.5 mm - for a lighting group, etc.
The formation of groups is carried out on the principle of "as little as possible", that is, a block of 4-5 outlets is allocated as a separate line and equipped with a separate machine.
Those who want to get rid of cables use open wiring on insulators. According to the PUE, it is allowed to place insulated wires in open form at a distance of 10 mm or more from a wooden surface.
The method, which was actively used back in the middle of the 20th century, is becoming fashionable again, so we will also pay attention to retro wiring.
Image Gallery
Photo from
Cable laying on porcelain or plastic insulators is allowed in log houses, glued beam buildings, in buildings with lumber trim, as well as in panel and frame structures
Retro wiring consists of stranded wires with insulation made of synthetic materials or PVC, which can be of different colors. Wire Material - Copper
When buying supplies, it is preferable to use products from reputable brands: GI Gambarelli, Mezzanine, Villaris, Salvador, BLF, Aldo Bernardi, Retrica, Bironi, Fontini
In addition to wires, insulators will be required (porcelain preferably plastic), bushings, stylized switches and sockets, junction boxes, installation decorative frames
During installation, you will definitely need cable cutters, pliers, wire cutters, a stripping tool, tape measures, levels, pencils or markers, screwdrivers, drills, drills, extension cords
Initially, it is necessary to draw up on paper the layout diagrams of the individual lines - lighting and socket, as well as indicate the location of the switches / sockets (including for low-current lines), switchboard
More than 3 wires usually leave the shield, so in this section you have to refuse retro-style wiring and use plastic boxes to match the color of the walls (to the nearest soldering box)
The first insulator is installed at a distance of 5 cm from the outlet / switch, the rotation angles are 90 degrees (option - 2 x 45 degrees through 2 insulators), at the intersection of the lines - junction boxes, the distances between the insulators are the same, not more than 40 cm
Using retro-style wiring in wooden structures
What type of wiring is called "retro"
Companies manufacturing quality products
Consumable fittings and installations for electrical work
Tools for electrical work
Input data - installation project
Features of connecting a switchboard
Rules for drawing lines from wiring products
Within a few years after the construction of the wooden house, it shrinks, so sagging wires is inevitable. To maintain a pleasant appearance of the lines without suspending, the wires are secured with cable ties above and below the insulators.
Additional information on open wiring is given in the article - Installation of open wiring: an overview of the technology of work + analysis of the main errors
Wiring methods for closed wiring
The main difference between hidden wiring is the restriction on the use of laying methods. According to the PUE standards, more precisely, according to clause 7.1.38, all components of the wiring laid behind suspended ceiling systems in false walls made of drywall and ducts are equated to a hidden option for laying electrical networks.
Fire and electrical safety rules state that for hidden wiring, only two types of products can be used - a polymer electrical corrugation and a metal pipe or duct made of similar material, specially designed for this purpose.
Consider one example of the construction of electrical wiring in a country cottage:
Image Gallery
Photo from
The characteristic ability of wood to increase and decrease following fluctuations in moisture and temperature must be taken into account when wiring. It is impossible to fix the cable rigidly, to locate sockets and switches in places of possible displacement during log movements
It is recommended to protect draft ceilings in kitchens and bathrooms of wooden houses with vapor barrier, which excludes the penetration of household fumes into wooden floors
Wiring branches are introduced into the room through a hole in the wall into which a piece of steel pipe is installed
For ceiling lights that will be hidden behind a suspended ceiling, separate lines are laid. In order not to cross the beams, in the example they are laid along the perimeter
Cable in a wooden house is laid freely. It is taken into account that during wood shifts it can be tense, which absolutely must not be allowed
On top of the vapor barrier protecting the wooden draft ceiling, lay the cable of the lighting lines to the points of connection of the lamps
The wiring laid on the ceiling to organize the lighting system is sewn up with plastic panels, siding, lining
In the points marked during the sheathing of the ceiling, holes are drilled through which the cable for the fixtures
Beam deformation due to log movements
Installation of vapor barrier on the draft ceiling
Entering power lines through the wall
Wiring for lighting
Fixing the lines of the lighting system
Cable feed to luminaire installation points
Panel ceiling lining
Forming holes for connecting fixtures
To install switches and sockets, it is advisable to choose a fixed or inactive wall independent of the log house, for example, constructed of foam concrete blocks or drywall:
Image Gallery
Photo from
Installation of the switch on a foam concrete wall
Cable routing in a shallow gate
Preparing for cladding
Finishing and connecting spots
On the inside, metal elements must be galvanized or painted so that they are not corroded during operation.
For a solid connection, a bell-shaped or similar method is not enough, therefore, soldering, electric welding, socket and threaded connections are used.

A variant of hidden wiring in metal pipes - in the future, the ceiling will be closed by a suspended structure. This solution is acceptable for cable laying in wooden floors, inside walls and partitions.
The use of metal hoses, corrugations and PVC boxes is also acceptable, but provided that the equipment is lined with a material that can not be burned: concrete, alabaster, plaster.
The main stages of laying closed electrical wiring:
- Road marking. It is necessary to calculate the length of the lines so that the number of turns and intersections is minimal.
- Preparation of walls and floors. It includes hollowing out a strob, drilling holes.
- Laying of metal pipes. The size of the product is selected so that the cable occupies no more than half of the internal space.
- Mounting metal boxes under switches and sockets. Copper pipes are attached to the boxes by flaring, steel pipes with nuts.
- Installation of junction boxes. Ideally, they should be connected to the pipes by welding or soldering to ensure 100% grounding.
- Electrical measurements. All metal elements of the units must be connected to the PE bus (all lines without exception must be with a grounding conductor).
- Cable pulling into pipes. To put the wires inside the metal pipes, use special pull cables.
- Installation of sockets and switches. When cutting the cable, it is necessary to make a small supply of wires in case of repair or replacement of equipment.
After the electrical installation of the hidden wiring is completed, you must contact the representatives of the electric laboratory. Many people forget that a technical report on the status of wiring and the quality of installation is a mandatory document.

Fire safety rules regulate the parameters of steel pipes for hidden electrical wiring. It is forbidden to install pipes and ducts made of steel with a wall thickness of 2 mm (or less) in rooms with a high degree of humidity and with condensation on the walls (ceilings) (+)
It should be understood that the installation of hidden wiring in steel, and even more so in copper pipes, is an unprofitable event from a material point of view.
In addition to expensive material, it is necessary to spend part of the money on good specialists, since a person who is far from wiring can not cope with the design of hidden wiring, and installation requires a qualified specialist.
Why do you need a ground loop
The design of electrical networks for a wooden house necessarily includes a section on the installation of the ground loop, without which the entire energy supply system to the building is considered unsafe. There are several ways to ground the device, and despite the prohibitions, all of them are still used.
You should refuse to assemble the circuit from improvised materials - this is dangerous. The traditional way of creating a “triangle” of metal corners and a tire requires free space in the house area, and since 2013 it has been banned as inappropriate to modern standards (GOST R 50571.5.54-2011).

The length of one mounting pin is 1.5 m. Vertical earthing switches are arranged in three ways: one line in a straight trench, a triangle, if there are only three elements, a quadrangle in the corners of the house
It is reasonable to use a modular-pin grounding method in a suburban area, according to which grounding conductors are installed in a line or around the perimeter of the house.
It does not require the allocation of impressive free space on the site, because all elements are located along existing objects. Only a hammer drill is needed to place the pin in the ground.
Steps for grounding device for a private house:
Image Gallery
Photo from
We develop a trench for the grounding device in accordance with the selected scheme. It will be a triangular, straight or quadrangular trench 0.7 m deep, approximately 0.5 m wide
Vertical earthing is driven with a sledgehammer or “drilled” into the ground with a drill. If there is any doubt in the calculations, it is better to connect the rods immediately with a wire and check the resistance
The method of assembling the ground loop is made by clamps or welding, depending on the presence and type of components that the owner of the house has. Conductive graphite grease is applied to all joints.
To lay the output of the grounding system and connect it to a common grounding bus, a trench is developed that leads to the house in the shortest way
If the common grounding bus is not located on the wall of the house in the box or in the control room, then we connect it to the current lead - a metal strip fixed on the wall of the house. All external parts of the system must be painted with a protective anticorrosion paint before putting into operation, a signal yellow color is recommended
Through the hole drilled in the wall, we enter the grounding wire into the house. Before entering the hole, we install a piece of metal pipe. It is advisable to close the cable entry and exit with dielectric plugs
We connect the ground wire to equipment that requires protection in the event of a breakdown of current to the chassis. It is imperative to connect: an electric stove, a refrigerator, a microwave, a washing machine, a volatile boiler
After assembling the system, we check the resistance of the grounding circuit. It must not exceed 0.03 ohms.
Step 1: Design a pit for the grounding system
Step 2: Installing the Vertical Earthing Switch
Step 3: Assembling the Ground Loop
Step 4: Grounding System Output Device
Step 5: Connect the ground to the current lead
Step 6: Connect the current lead to the common system
Step 7: Connect the ground to the equipment
Step 8: Test the resistance after connecting
To increase the conductivity, factory-made electrodes are coated with copper, and all joints, threads and couplings are lubricated with conductive paste during assembly.
As a rule, paste also includes anti-corrosion additives. As a protection against aggressive environmental conditions, all connections are also wrapped with waterproofing material.
The advantages of prefabricated grounding systems of the pin type are efficiency, low labor costs, space saving, the main disadvantage is the high cost.
It is precisely because of the high cost that many owners of wooden cottages and country houses still use pieces of metal wire segments or reinforcement for the installation of the ground loop instead of factory products.
Fire protection measures
If we analyze the entire process of electrical work in a wooden house from the point of view of safety, then we can distinguish the main rules:
- correct selection and installation of RCDs;
- installation of the ground loop in a modular pin manner (with a resistance of 4 ohms);
- potential equalization system device;
- ensuring continuity of grounding throughout the network;
- installation of overhead sockets only;
- flush mounting - in metal boxes and pipes.
At the end of the electrical work, the risks of accidental fire or electric shock, as well as the breakdown of household appliances due to unsatisfactory wiring conditions, should be completely eliminated.
In the process of laying tracks and installing electrical installations, there are many nuances that only professional engineers and electricians will help to cope with.
How to install the socket using a wooden lining:
Hidden wiring rules:
General information about wiring in a wooden house:
Installation of the power grid in wooden structures that are considered combustible requires special attention, experience, knowledge of technical nuances and compliance with regulatory requirements.
For the preparation and approval of project documentation, the introduction of an electric cable into the house, as well as the installation of hidden wiring, we recommend contacting specialists. This does not interfere with work on your own - for example, install a power outlet.
If you have questions or have a desire to share personal experience in electrifying a wooden house, please leave comments on the article. The feedback box is located below.