Work on installing new plumbing for many novice masters is a concern. A variety of constructive solutions for plumbing fixtures and how to connect them requires the performer to know the intricacies of the process.
The main ones we will try to reveal and disassemble how to properly install the toilet with your own hands without the help of plumbers.
Design options for modern models
The assortment of plumbing on the market is diverse. Any owner has the opportunity to choose presentable and functional equipment to his own taste and wallet.
In addition to traditional floor models, manufacturers offer a wide selection of hanging and built-in devices. The drain tank in them can be attached to the wall or connected to the base of the plumbing.

The embodiment of the bowl of floor and hanging models can be any, for example, dish-shaped, funnel-shaped or even visor modification
The latest toilet models also differ in the design of key assemblies.
The outlet discharge happens:
- horizontal;
- vertical;
- oblique.
The type of outlet drain should be considered when choosing a model. If your plans do not include alterations to the supply of sewer pipes, then in the installed model the drain should be arranged on the same principle as in the dismantled one.
Inconsistent drains and plumbing supplies, provided that this is not a toilet with an outlet, is almost impossible to combine as tightly and efficiently as possible.
Plumbing is fixed to the floor by means of specially made two or four attachment points. But you can also find models in which the corners that come with the product are used for attaching to the floor.
General guidelines for installing toilets
The new plumbing fixture can be replaced with the old one, or you can choose another “corner” for it, after making a small redevelopment in the bathroom.
Preparation of tools and materials
To connect the tank to the water supply you will need a flexible hose. It usually comes bundled. To connect to the sewer - a rigid fan pipe or a bendable corrugated cuff.

It is impossible to do the installation of the toilet with your own hands without the minimum set of necessary tools that any owner has in the house
To assemble the structure and connect to the communications you will need:
- hammer drill or hammer drill;
- a set of screwdrivers with a flat and cross-shaped "sting";
- set of wrenches;
- building level;
- a simple pencil or marker;
- stationery knife;
- roulette;
- chisel;
- a hammer.
If the installation of plumbing will be carried out on tiles, it is also necessary to prepare a “ballerina” or a spear-shaped drill for tile work. To make holes for the installation of fasteners, you will also need a drill of 8 or 10 mm.

If the toilet is planned to be connected to a cast-iron socket, it is necessary to prepare a transition cuff of rubber measuring 123 x 100 millimeters
From auxiliary materials will also be required:
- metallized tape;
- silicone sealant;
- FUM tape;
- polyethylene film;
- moisture absorbing piece of fabric;
- container for collecting liquid.
Depending on the type of model to be connected and the installation method, cement mortar may also be required.
Dismantling an old toilet
Disconnecting an old toilet is one of the most time-consuming operations.
The work is carried out in several stages:
- Override the tap.
- The hose going to the tank is disconnected from the water supply, the water is drained from it.
- The empty tank is removed from the mounts.
- Unscrew the nuts located on the back of the toilet and disconnect it from the sewer. To loosen the drain, the toilet needs to be shaken from side to side.
- The remaining water is drained from the toilet by tilting the bowl forward.
- The sewer hole closer to paradise is cleaned of dirt and temporarily clogged with a rag or wooden cork of a suitable diameter.
It is easiest to break the bolts by holding the head with an open-end wrench and unscrewing the nut with an adjustable wrench. If threaded connections are heavily slagged with salt deposits or rusted.
The use of the “WD-40” universal grease, which is capable of loosening deposits in a matter of minutes, will help to alleviate the problem. For lack of such, you can use vinegar or kerosene.

The sewer opening must be closed so that toxic hot gases do not spread outside the pipeline
If a rotten taffeta or any other support is found under the dismantled toilet, it must be removed. This can be done with a puncher, nail clipper or a chisel.
In old-built houses, plums on sewer pipes are often fixed by cement plaster. It is easiest to knock down a dried solution with a chisel, pricking it in several places. Read more on how to dismantle an old toilet.
Image Gallery
Photo from
Old toilet mounted on the tile
Fastening the toilet to the base through taffeta
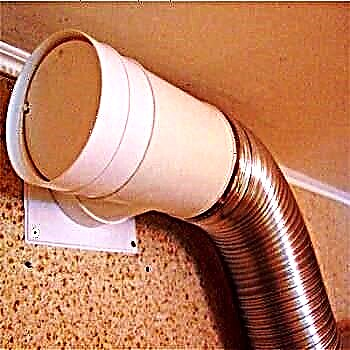
Connection to the sewerage by a corrugated pipe
Connecting plumbing to a cast-iron sewer
Construction Assembly Sequence
For safety reasons during transportation and to save space, plumbing fixtures arrive disassembled in stores. For the possibility of self-assembly, an illustrated instruction is attached to each product.

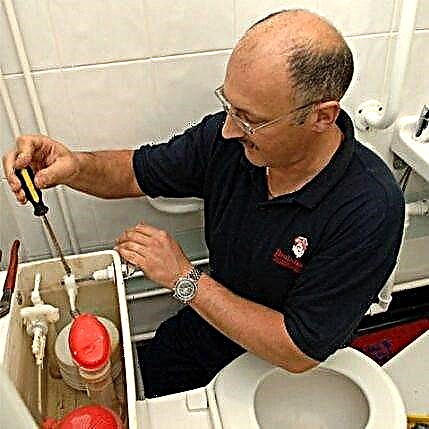
When assembling the structure, key attention should be paid to the correct installation of the float, whose main task is to regulate the pressure and volume of the water filling the tank
The assembly diagram of the structure in general terms is as follows:
- A drain mechanism is mounted in the tank, which is included in the package for the device in an already assembled form. When installing the mechanism, it is important to look at the contacting surfaces. If any burrs are found, remove them.
- A sealing rubber washer is thrown onto the mechanism. The device is immersed in the tank and fixed with a nut.
- A tank equipped with a drain mechanism is attached to the bowl shelf. The elements are fixed with nuts and bolts, after having put washers and rubber seals on the fasteners.
When installing the tank fittings, the plastic nuts of the filler valve and the drain mechanism are manually tightened without excessive force. In the process of twisting, it is necessary to adhere to the mechanism itself, thereby protecting the gaskets from turning and damage.
The base for installing the plumbing fixture must be level. If the floor surface or the base of the toilet is uneven, it is necessary to place rubber or plastic gaskets under the sole during the installation process before final tightening. The position of the device is leveled using a building level.

To align the position of the installed structure, you can dismantle the old lining and pour cement screed with a thickness of 25-40 mm
Chopiki can also be used for this purpose. Holes are made in the floor for their installation. Chopiks are set in level, deepening to the required depth. Using screws, the toilet is attached.
The sole of the bowl is exposed to the prepared base. At points of attachment, marks are made that act as a reference point for drilling mounting holes. The dowels are driven into the mounting holes. Fasteners inserted through the sealing nuts are tightened and closed with plugs.
Accession to the sewerage
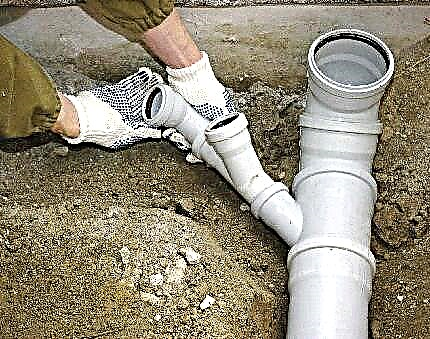
The most budgetary and easiest option to connect to the sewer is with a corrugated or eccentric cuff. This connection method saves in cases where it is difficult to determine the exact distance from the drain of the sewer pipe to the outlet of the toilet, or when the plumbing is installed in a place inconvenient from the point of view of installation.

Corrugated pipes bend and stretch perfectly along the entire length of the product, and eccentric cuffs can easily compensate for the angle of deviation from the alignment of the joined pipes
From the neck of the sewer outlet, remove the wooden cover and remove the rag plug. The bell is cleaned of accumulations of dirt, rust and residual solution. One end of the cuff is inserted into the neck of the sewer. The seam is sealed, covering in 2-3 layers with the composition. The other end of the cuff is attached to the release.
If the installation has to be done in a cast-iron bell, then the cuff is inserted with the petal part into the adapter measuring 123 x 110 mm. The free end of the adapter is buried in a cast-iron socket, covering the place where the elements are joined by a sanitary sealant.
To connect the outlet of the plumbing fixture, the free end of the cuff is inserted into the protrusion and rotated all the way so that the piping holes completely coincide.

When carrying out work under the landing heel, a pad should be placed that comes with equipment, or a piece of soft tissue
The connection is sealed and checked experimentally by pouring 8-10 liters of water into the toilet. If a leak is detected, the joint is re-sealed and checked. If no leaks are found, you can proceed to fix the toilet.
To create a more reliable joint, it is better to connect the branch through the fan pipe. In addition, when a fan pipe is activated, the plumbing fixture acquires a more presentable appearance.

Plumbing is connected to the communication by means of a bell, using adapters, beveled at an angle of 30-40 °, and sealing cuffs
When working with fan pipes, it should be remembered that undercuts are contraindicated for them, and during the installation process their tight design cannot be changed. We also invite you to familiarize yourself with our other article, which describes in detail how to connect the toilet to the sewer.
Water connection
At the final stage of installation, they connect to the water supply system. Water is supplied from above or below the tank, using the flexible hose that comes with the kit. One end is screwed to the outlet of the tank, and the second to the water pipe.
Image Gallery
Photo from
Fixing a compact toilet bowl
Bottom connection to the drain tank
Lateral connection of water supply
Adjustment of water level with the help of fittings
Lateral approach can be made on the right or on the left side of the tank. Therefore, at the stage of purchasing the product, the method of supplying water should be chosen, focusing on how the pipes are laid in the bathroom.
It is better to give preference to devices with a bottom connection. In them, water enters the tank from below, due to which the noise level during collection is much lower.

When installing a flexible hose for water supply, the nuts are first "manually" bolted and then tightened with a key, remembering to use silicone or rubber washers for sealing
When purchasing a flexible eyeliner, when choosing the length of the product, it is necessary to focus on the distance from the connection point on the water pipe to the point of attachment of the toilet filling mechanism. A margin of 15-20 cm is added to the obtained value for reliability.
The thread at the joints can be both external and internal. Its size is 1/2 or 3/8. For docking, adapters and FUM tape may be required.

In order to be able to shut off water between the water supply system and the tank, in case of an unforeseen or emergency situation, a shut-off valve is installed.
Options for connecting a plumbing fixture
As already noted, a wide variety of plumbing fixtures are on sale, which can have one of three types of connection to the sewer: with horizontal, vertical and oblique outlet. Each of them has its own characteristics.
Option # 1 - Vertical Issue
Such models are popular in European countries. Their design is such that the siphon and outlet pipe located in the bowl “look” down.

Due to the fact that the vertical outlet "looks" down, the plumbing fixture can be installed anywhere in the bathroom, placing it relative to the wall at any angle
To connect a plumbing fixture with a vertical outlet, perform the following actions:
- At the outlet point of the drain pipe, a screw flange equipped with a locking device is mounted.
- A sewer pipe is placed in the center of the flange, clamping it while turning.
- The toilet bowl is “mounted” on the flange, reliably securing the outlet pipe.
The connecting parts of the flange and the vertical toilet outlet are standard. Difficulties with their connection should not arise.
The installation and connection process is presented in the following selection:
Image Gallery
Photo from
Step 1: Install the flange in the drain hole
Step 2: Preparing Fasteners for Fixing the Toilet
Step 3: Installing the screws and attaching the flange
Step 4: Fitting the o-ring to the installation site
Step 5: Installing a Direct-Release Toilet
Step 6: Install the drain valve in the tank
Step 7: Putting the tank on the toilet shelf
Step 8: Attaching the Tank with the Mounting Nuts
The cuff of the screw flange must fit snugly into the outlet, to ensure full articulation during installation, it must be turned. An o-ring located between the flange and the toilet drain will ensure reliability and good tightness of the clamp. With step-by-step instructions for installing a toilet with a vertical outlet, you can read in this material.
Option # 2 - with horizontal release
Plumbing fixtures with horizontal outlet have become one of the most popular in our country. The relevance of installing such equipment is explained by the specifics of the wiring in the Russian apartments of the sewage system.

The main feature of toilets with a straight horizontal outlet is that a strictly fixed connection point to communications is required for proper installation
The horizontal outlet is located in the back of the bowl or base and is directed back. Models with this design are installed end-to-end with a wall, connecting to any type of location of the sewer riser.
Connection is carried out with the help of nozzles of the appropriate size. The joint is sealed by placing a sealing gum inside the pipe.
Direct connection is performed only if the sewer system is made of plastic. To connect to cast-iron pipes, the circumference of which is rarely ideal, cuffs and eccentrics are used.
Option # 3 - with oblique release
The bell in models with an oblique outlet is located at an angle of 45 ° relative to the floor surface. Models with an inclined outlet win against their counterparts in that they are less likely to clog, since this design allows you to create less resistance when moving solid sewage.

The vulnerability of oblique outlet devices is the junction points of the product with the sewer pipe, which, if improperly installed, can be cracked
Connecting a device with an oblique outlet to the sewage system can be performed in one of three ways:
- By direct connection through the socket of the sewerage branch. Choose when there is no need to move the plumbing fixture, and the direction of all elements clearly coincides. The toilet outlet is treated with a soapy solution and buried in a socket equipped with a cuff.
- Connection via an eccentric.A bell with a 5 cm offset center, equipped with a gasket, is mounted in the sewer outlet and the toilet is moved to the right or left side by rotation.
- By installing a corrugated elbow. The use of the corrugation makes it possible to deploy the device of the relative oblique outlet of the sewage system even at an angle of 90 °.
Flexible tap - although convenient, but not the best way to connect to the toilet with an oblique release. It should be used only in extreme cases, when there are no other ways to use it.
To learn more about how to install a toilet with an oblique outlet, follow the link.
Image Gallery
Photo from
Use of corrugation in connection to the sewerage
Reinforced corrugation for reliable performance
Connection of the toilet to the side outlet
Cuff in the sewer connection
Features mounting models compact
The technology for the correct installation of compact toilet floor toilets includes seven main steps:
- The toilet bowl is pushed as tightly as possible to the drain hole and it is checked whether the outlet coincides with the sewer socket.
- In the presence of small displacements, the device is connected to the drain of the sewer using a corrugated pipe.
- A plumbing fixture with a connected corrugated pipe is pushed against the wall, making sure that strong creases and bends do not form on the pipe.
- The ends of the connecting element are coated with a thin layer of silicone sealant.
- After adjusting the position of the device, the outline of the boundaries of the sole of the device and the point where it is planned to drill holes for deepening the dowels are drawn with a pencil.
- The toilet is pushed to the side. Holes with a diameter equal to the size of the dowels used are drilled at the designated points with a diamond drill.
- Plastic plugs are buried in the holes. The toilet is "hoisted" in its original place. Bolts are screwed into the prepared holes.
Tip: to facilitate putting on the corrugated pipe to the outlet, it is necessary to smear its end along the inner walls with liquid soap.

If the holes have to be made in the tile to minimize surface damage, first slowly drill the top layer by hand, and only then turn on the hammer drill with hammer drill mode
In order to ensure the closest fit of the toilet sole to the floor, silicone is applied to the intended installation counter. The toilet itself is then put in its original place, guided by the intended contour.
To fix the plumbing fixture, the washers and screws threaded through the holes in the fifth heel are tightened very carefully. They should never be driven in!
Photo-guide for the assembly and installation of a compact
Consider the process of installing a toilet on the example of the assembly and fastening of Chinese plumbing PORTA. An excellent product with a 25 year manufacturer's warranty and a very attractive price.
Image Gallery
Photo from
Step 1: Preparing the floor for installing a new toilet
Step 2: Replacing sewer pipes and fittings
Step 3: Replacing the cold water pipes
Step 4: Fitting the toilet to the installation site
We assume that we have successfully completed the preparatory phase, now we will proceed directly to the installation of plumbing equipment and to connecting it to the communications:
Image Gallery
Photo from
Step 5: Drilling holes in the screed
Step 6: applying silicone to the outline of the toilet sole
Step 7: Installing the toilet and connecting to the sewer
Step 8: Preparing Silicone for Further Work
Step 9: Screw the toilet to the floor with screws
Step 10: Installing the flush toilet bowl
Step 11: Assembling and Installing the Seat with Cover
Step 12: Connecting the tank to the water line
Monoblock type toilet installation
Monoblock models are delivered to the market in assembled form. They do not require adjustment of the drain mechanism, since all fittings are already adjusted at the factory.
Otherwise, the technology for mounting monoblock models does not differ from the installation of "compact" toilets. Connecting to communications and fixing the device itself is carried out in an identical way.

Fastening to the base of a sanitary appliance of the “monoblock” type is performed by tightening the elongated screws, and if it does not have fastening “ears” - by cementing
An important point! If the holes in the toilet bowl are made at an angle relative to the floor surface, then they must also be drilled at an angle. We also recommend that you read the article on choosing monoblock toilets.
Installation of suspended structures
Installation of suspended models should be carried out as part of a major overhaul until the start of finishing work. In order to correctly install a suspended toilet, it must only be attached to a solid wall of solid brick or concrete, which can withstand considerable loads.
Image Gallery
Photo from
Step 1: Layout the projection of the installation on the floor
Step 2: Marking the frame mount points on the wall
Step 3: Mounting the installation on the wall
Step 4: Installing the tank, fittings and nozzles
When choosing a place for installing a hinged structure, it should be noted that the shorter the pipe section connecting the plumbing fixture to the sewage system, the easier it will be to clean it in case of clogging.
The installation of the suspension structure is performed in the following sequence:
- Markup. When choosing a location, it is important to consider the location of the branch in order to obtain the optimal slope of the pipe.
- Sewerage and water supply. At the point of placement, a sewer pipe D 110 mm is withdrawn.
- Frame installation. A rigid frame is assembled, adjusting its position with the help of adjustable legs and fixing it with dowels and anchor bolts.
- Mounting the toilet bowl. It is placed at a height of 40 cm from the floor.
- Water supply to the tank and connection of the outlet to the sewer. A rigid pipe is used for water supply, and a corrugation is used to connect the outlet.
Then make a seal of a niche. It is possible to revet a niche with any finishing material, without forgetting to leave an inspection window for access to a tank in case of carrying out preventive measures or elimination of an emergency.
Before installing the frame, it is important to align on all planes using the building level. The frame itself is attached to the wall with support brackets, and to the floor - with anchor bolts.
A few tips from experienced professional plumbers help you avoid serious mistakes and get through the installation faster.
How to install the tank:
Video lesson on the installation of equipment:
Subtleties of installing suspended plumbing:
With proper execution, self-assembly of a plumbing fixture should not cause any particular difficulties. The main thing is not to rush it into commissioning right away, giving silicone time to solidify thoroughly.
Already had to install a toilet yourself and have valuable experience that you can share with visitors to our site? Please leave comments in the block below. There you can ask questions on the topic of the article or give valuable advice to those who have never encountered such work.