The film-type infrared floor heating system is one of the innovative and unique developments that allows you to solve problems that arise when arranging home heating.
How to choose the right accessories for the system and lay the infrared warm floor with your own hands, we will consider in more detail.
How is the IR system arranged?
Infrared underfloor heating is a rather complicated system, which you cannot make on your own at home.
The system is based on a unique nanostructure, which is capable of generating infrared radiation invisible to the human eye.

Depending on the type of design of the heating elements, the infrared systems are divided into two main types: rod and film
The film systems are made of strips of carbon paste - high-strength carbon fiber, which are hidden under a heat-resistant plastic film.
All strips, the thickness of which does not exceed ten millimeters, are located at an equidistant distance of 10-15 mm and are parallel interconnected by flat current-carrying busbars protected by a silver coating.

Under the influence of electric current supplied to the tires, carbon elements begin to emit infrared radiation, the wavelength of which in the bioresonance range varies from 9-20 microns
The core systems are graphite-silver rods, inside which carbon material is laid. They are interconnected by stranded wires and sealed in a protective copper sheath. Systems are available as separate cables or prefabricated bays.
Infrared rays in such systems act in a straightforward manner, and therefore cause heating not of the surrounding air, but of objects located indoors: flooring, furniture, walls and ceilings. Due to this property, the rate of infrared heating is much higher than traditional analogues - electric and water systems.
The indisputable advantages of infrared film warm floor include:
- Environmental friendliness. Infrared rays are similar in effect to sunlight and therefore have a beneficial effect on all living organisms. They have no side effect.
- Easy installation. The design features of the system allow for minimal cost and effort to produce high-quality installation, owning only the basic skills of construction work.
- Compatibility with different types of coating. Laying of an infrared heat-insulated floor is allowed to be carried out immediately “on dry” under a carpet, parquet board, linoleum or laminate.
Due to the fact that the heating elements in the film system are densely laminated with a polymer layer, they are not afraid of accidental dents and punctures, as well as exposure to moisture. But even in case of damage to one of the carbon strips due to the parallel connection scheme, the remaining elements will continue to work.
Image Gallery
Photo from
The easiest to install system
Benefits of Film Floors
Laying on a wooden base
Possibility of laying in open areas
Cutting film system for mounting
Laying laminate on infrared floors
Laying linoleum on the infrared version
IR system under carpet
The thickness of the thermal film does not reach 5 millimeters, and therefore practically does not “eat up” the height of the room. Thanks to this, it can safely be installed under almost any coating. In addition, such a film can be placed on vertical surfaces, fixing to the walls and ceiling, providing zone heating of the room.

The vulnerability of the system is the fear of “locking”, in which heated areas can fail under the weight of large objects installed on them
For this reason, the film material is laid only in those areas where large equipment and furniture will not stand. With caution, it is worth using infrared systems in wet rooms, as there is a risk of electric shock.
The energy consumption for the operation of an infrared warm floor directly depends on the mode of operation of the system and the working area of the room. We also recommend that you read our other article, which describes in detail the film type of heating for rooms.
The choice of system components
In addition to carbon heating strips sealed in mylar, the film floor system requires a temperature controller equipped with a temperature sensor.
Film Options
There are a lot of options for film floors on the modern market. And they all have approximately similar characteristics: power consumption from 25 to 80 W / h, and operating temperature from 30 to 50 ° C.
On sale you can find two types of film systems:
- solid - in them the film is completely covered with carbon material;
- striped - in them the carbon material is deposited on the surface in the form of strips 15-20 mm wide.
The difference between them is that in continuous systems the material is applied by rolling on the surface in the form of a paste, and in striped - by fragmentary spraying.

For small rooms, it is better to choose a film whose width is 50 cm; for more spacious rooms it is more profitable to purchase strips 100 cm wide
The thickness of the material can vary from two microns to 0.4 millimeters. The length of the roll is 50 meters.
There is an opinion that it is better to choose the thinnest films. But, as reviews show, the smaller the carbon layer, the faster the system crashes. Therefore, it is more advisable to purchase material no thinner than 3 mm. For example, for countries in Europe and the United States, the thickness of 0.338 mm is considered the best option.
Such systems are not cheap. The average price range of film IR systems from leading manufacturers varies between $ 20-25 per square meter. You can read more about the types of film underfloor heating in this material.
Calculation of the required amount
Installation of a film floor with an infrared type of heating is carried out only according to the useful area of the room.
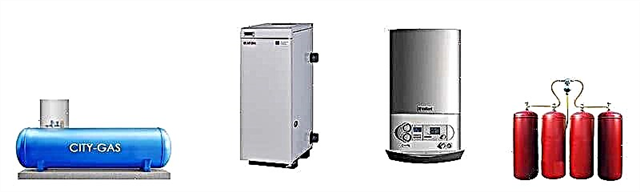
The percentage of the covered area depends on whether the IR system acts as the main or additional heat source:
- 80% of the area - as the main heating;
- 40-50% of the area - as an addition to radiator heating.
Determining the total length of all the strips will help the diagram of the layout of the zones of the system previously drawn on the sheet. After calculating the length of each fragment and adding up their number, it will not be difficult to calculate the necessary total length of the coating.

When calculating the covered area, it should be borne in mind that according to the norms, each wall will need to be indented 10 to 20 centimeters
To prevent premature failure of the floor system, when laying out, it is necessary to distance yourself from the pipes and risers of the central heating. The laid strips should not intersect and overlap each other.
When placing fragments on the plan and calculating their length, also take into account that the length of each strip should be a multiple of 17-18 centimeters, since cut lines are located in these places.
Temperature controller for temperature control
The IR system is controlled by a temperature controller. The temperature sensor that comes with it is located between the heating elements, and is connected to the device through the contacts. The sensor reads the temperature from the surface of the film and transmits the data to the thermostat, which, in turn, works and puts the system into operation.

The main purpose of the device is to track the floor temperature according to the sensor and in accordance with the specified parameters to adjust the heating power
Variants of modifications of regulators, differing in functionality, a huge variety is presented on the market today.
All of them are conditionally divided into two types:
- Mechanical - equipped with keys and mechanical wheels and are suitable for arranging small-area systems.
- Electronic - equipped with push-button control and display, applicable for small non-zoned rooms.
Programmable models are equipped with touch screens, with which you can set 4 time modes at once, thereby saving up to 50% of energy consumption.
Temperature sensors, depending on the type of device and type of flooring, are available in two versions. For soft coatings, they are available in the form of compact plastic vessels. For solid - in the form of larger elements equipped with gel protection against exposure to strips of adhesive compositions and the prevention of mechanical damage.

Some models of temperature controllers are able to read information about heating the floor surface, while others can additionally analyze the degree of heating of air in the room
When choosing a device should focus on the power of the thermostat. It is calculated based on the fact that one square meter of film on average consumes 50-70 watts. To determine the required value, the indicator is multiplied by the size of the working area, covered with heating elements.
Budget models that operate on the network often “sin” in that in the event of an emergency power outage they cannot resume work on their own. Therefore, it is better to give preference to models in which a battery is provided. And read more about choosing and installing a thermostat for a warm floor.

If the film system is supposed to be combined with a coating of porcelain stoneware or tile, it will be necessary to build a cement-sand screed
Installation of infrared floor heating
Installing an IR system for a particular coating has its own characteristics. So, planning to use soft materials such as linoleum or carpet as a finishing coating, sheets of fiberboard or plywood should be laid as a layer between the heating strips and it.
A rigid layer will protect the film from “injury” due to the punching of the cover with legs of heavy furniture or women's heels.
In any case, the installation of an infrared warm floor system is carried out in several stages.
Image Gallery
Photo from
Cutting the infrared system on the panels before laying
Insulation of current-carrying bimetallic element
Sealing the edge of the cloth with ordinary tape
Strobes for laying terminals for wiring
Thermal insulation substrate
Electrical connection device
Laying the infrared floor over the entire area
Laying the flooring in the IR system
Acquisition of materials and tools
In addition to the IR film itself, it is also necessary to purchase rolled thermal insulation material, as well as metallized, or one-sided construction tape for fixing it. The film itself is attached to the base using double-sided tape.
To carry out the work, you need a set of tools:
- a grinder equipped with a stone disc;
- hammer drill;
- knife or scissors;
- pliers or pliers;
- construction mixer;
- notched trowel;
- wide brush;
- container for mixing the solution.
If you have not already made a layout diagram at the stage of selecting the material, this must be done now, taking into account not only the size of the room, then the width of the stripes used.

The layout of the room should reflect the placement of furniture and areas with fragments of heating elements
The arrangement of the films can be either longitudinal or transverse. The best option is to choose based on material savings. But still experts recommend placing stripes in length. This minimizes the number of connection points.
Base preparation
When preparing the base for laying the IR system, it is not at all necessary to dismantle the old coating. Dismantling will be required only if the base base is badly damaged and the surface is “strewn” with deep cracks and potholes.
According to the norms, the permissible height difference of the base base for the film system is only 0.2-0.3 cm per linear meter, regardless of the direction of the control rail attached to the surface or the construction level.

When preparing the base, it is necessary to clean the surface of debris and dust, and if necessary, putty cracks and eliminate other minor flaws
The technology of laying the IR system involves the arrangement of a heat-insulating layer, the main task of which is to prevent heat leakage through the floor slabs, thereby increasing the efficiency of the system.
As a heater, it is best suited:
- Isolon or Penofol- Roll insulation made of foamed polyethylene. They are distinguished by excellent waterproofing qualities, as in the process of foaming, closed, water-tight cells are formed;
- Cork backing - compressed particles of balsa wood mixed with suberin binder.
When installing underfloor heating, priority is given to substrates with a lavsan metallized or foil cladding. It enhances heat transfer due to its own reflective effect.
The structure of the listed materials will prevent moisture absorption, performing the function of a waterproofing, and the reflecting surface will direct the generated heat directly to the room, and not to the underlying floor.

The rolled material is laid on a cleaned surface with the foil side up, placing strips end-to-end to each other
The substrate is spread over the entire area of the room close to the walls. The joints of the strips laid on the floor are fastened together with masking or aluminum tape. If the thickness of the material is small, it is possible to fasten the strips laid with a small overlap with construction brackets.
Laying the film system
In accordance with the marking, a film is cut into individual fragments, given that the maximum length of a single piece of cloth should not exceed eight meters. Cutting can be done with scissors or a knife. The sliced fragments of the strips are sequentially laid out on a substrate according to the pattern.

Separated strips in accordance with the scheme are laid out on the surface, directing contacts to the wall where it is planned to install the thermostat
Film cuts are stacked face up or down in accordance with the manufacturer's manual. Strictly according to the instructions, the bands of the IR system are placed. For example, Caleo film strip strips are laid with a lateral overlap so that there is a 1 cm gap between adjacent copper bars.
If the brands whose manufacturers are recommended to lay strips without overlap and with a more impressive distance between the tires. When laying, it is not allowed to bend carbon strips at an angle of 90 °, as this can damage a fragment of the system.
If necessary, the strips are cut along the perimeter of the room, making cuts in the areas strictly indicated by the dashed line on the film. Approximate dashed stripes for the cut are usually located every 18 cm.
Image Gallery
Photo from
Features of wiring
Entering one of the clamping plates under the film
Clamp Mounting Pliers
Pasting the terminals with bitumen tape
To fix the film to the surface using double-sided tape. This solution allows you to prevent the shift of elements relative to the markup and each other.In the process of laying strips of infrared warm floor, it is important to prevent damage to the material, which often happens when the tools used during installation are accidentally dropped on them.

Places of film cuts where conductive conductors are affected must be covered with bitumen insulation, eliminating the ingress of air between the tire and adhesive tape
We also have other materials with a detailed description of the installation process of the film system, depending on the type of flooring. We recommend that you familiarize yourself with them.
- How to make a film underfloor heating under linoleum: instructions for laying an infrared heating system
- Laminate underfloor heating: installation and installation of a film infrared system
- How to make an electric heated floor for tiles: film and cable option
System Connection Diagram
Each strip is equipped with a copper clamp, which reliably connects to a conductor made of the same material. To connect the terminal, you will have to separate a section of 8-10 mm from the cut from the lamination, and carefully separate the silver and copper bus on the edge.
The contact is inserted strictly in the middle of the end of the conductive bus so that one side of it is in contact with it, and the second is adjacent to the inner side of the film. The contacts are crimped with pliers, trying to prevent sparking.

The wires leading from the temperature sensor to the thermostat are also laid in accordance with the scheme and lead to the device through the baseboard
The current leads with the “tails” of conductors stripped by 10-12 millimeters are connected to the contact terminals and connected: to one, “0”, to the other, “phase”. Connected terminals are gently clamped with pliers or pliers. If it is possible to apply soldering, the wires to the busbars can simply be soldered, and the joints should be sealed with insulation.
After connecting each piece of film, it is necessary to check the fixation of the clip by slightly pulling it. It should not shift relative to the film.
The connection of the bands is performed using a parallel circuit. This means that wiring will only be done on one side. For "feeding" use stranded copper wires with a cross section of 1.5 sq. Mm.
The joints of the clamp with the wires after crimping with pliers, as well as sections of the copper busbar cut on both sides, are necessarily isolated with cuts of vinyl-mastic tape, which is always included with the system.
At the free ends of the wires attached to all sections of the heating film, the resistance of the circuit is measured. Ideally, the calculated load should be 20% lower than that declared by the manufacturer of the selected model of thermostat. If the received load corresponds to the maximum allowable indicator of the selected thermostat, proceed to its connection.
Mounting the control device
In order for the heat regulator to work correctly, the thermal sensor is fixed with adhesive tape on the underside of the heating sheet. Its installation is carried out using a 16 mm corrugated tube, which is included in the factory package.

The temperature sensor should be placed strictly on the insulating layer; otherwise it will not show the true floor temperature
So that a tubercle does not form at the point of installation of the temperature sensor, it is recommended to make shallow grooves in the base and heat-insulating layer. The location of the device is chosen as close as possible to the thermostat. The distance from the wall should be at least 30 cm.
There are no special requirements for the installation of a thermostat. It can be placed in any accessible place, hidden from direct sunlight. However, choose a place to install it in advance, because it is better to lay the strips of the film system with the contacts to the wall on which the regulating device will be mounted. This method reduces the length of the connecting wires.
Mounting option can also be any:
- outer - in which the device is fixed directly to the wall surface;
- hidden - involves the creation of a recess in which the device will be hidden.
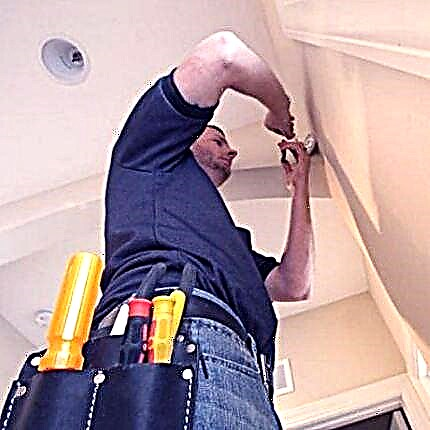
To perform flush mounting in the wall using a grinder or puncher, make strobes with a depth of 20 mm, into which the electrical wiring is laid.
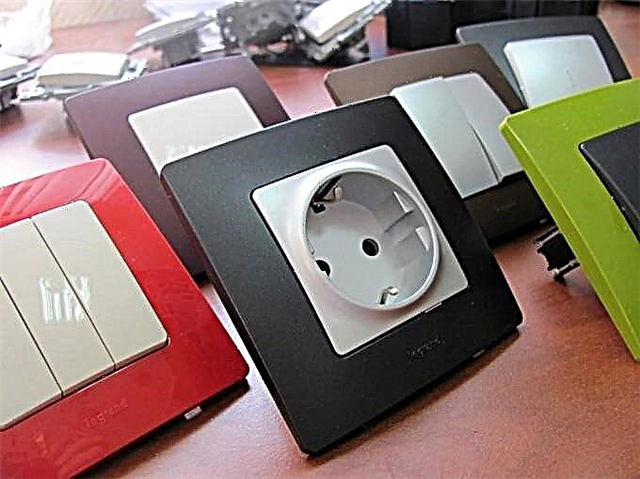
The installation technology of the temperature controller is not much different from the installation process of a conventional electrical outlet. To equip the "nest" in the wall with the help of a crown, make a niche into which the undergrowth is buried. Place the device at a height of 80-90 cm from the floor.

To connect the wires, they clean the ends of the cores and lead them into the corresponding contacts, focusing on the marking and color of the insulation
Having connected the thermostat, it remains only to connect the free end of the temperature sensor laid in the corrugated pipe to the sensor terminals.
Test run IR system
After the installation and connection of the infrared warm floor is completed, it is necessary to check the operability of the system. Before starting, check the insulation of the connection points. First, verification is performed using a tester. The performance of the system should correspond to those specified by the manufacturer.

With the correct calculation of the power of the thermostat and the installation of the temperature sensor, automatic shutdown of the system should occur within half an hour from the moment of switching on
After starting the system, carefully check the uniformity of heating of each element. If problems are found on individual fragments, they are eliminated or segments of strips replaced with new ones.
If when the state is on, everything warms up evenly, and the contacts do not "smell" and do not spark, you can proceed to the stage of installation of the floor covering. It is better to save the IR system installation plan itself by attaching it to the product passport or by sketching on the back of the warranty documentation.
We also suggest that you familiarize yourself with our other material, which describes in detail the rules for installing and operating an infrared warm floor.
Installation kit for laying the system:
Substrate construction and laying of heating strips:
Installation of the sensor and thermostat:
The film-type system is not complicated in execution. And therefore, even without the appropriate skills, installation can be done in just one day. The main thing is to strictly adhere to the styling technology. This will protect you from an emergency and premature system failure.
Thinking about installing an infrared floor system, but don’t know where to start? Or do you have experience in installing such systems and can give practical advice for our readers? Please leave your comments, ask questions, share the experience of using the film floor system in the block below.